If a seller wants to sell across India they need to register for GST. The GST is meant to replace a slew of indirect taxes with a federated tax. In the GST Regime, businesses whose turnover exceeds Rs. 40 lakhs* (Rs 10 lakhs for NE and hill states) is required to register as a normal taxable person. The registration process is entirely paperless which means that it will take place online or digitally. Registering for a GST might seem confusing but just follow our Step by Step guide to Register your business for GST online easily.
There are Two parts for Registering GST online.
Part A - Generate your GST Application form
Part B - Filling in your GST Application form
Documents Required
- PAN of the Applicant
- Aadhaar card
- Proof of business registration or Incorporation certificate
- Identity and Address proof of Promoters/Director with Photographs
- Address proof of the place of business
- Bank Account statement/Cancelled cheque
- Digital Signature
- Letter of Authorization/Board Resolution for Authorized Signatory
Part A
First you need to visit official GST portal - https://www.gst.gov.in/ and under the services tab, choose Services > Registration > New Registration.
On the registration page, enter all the requested details (including your PAN number), email address and mobile number. You need to select the option I am a Taxpayer.
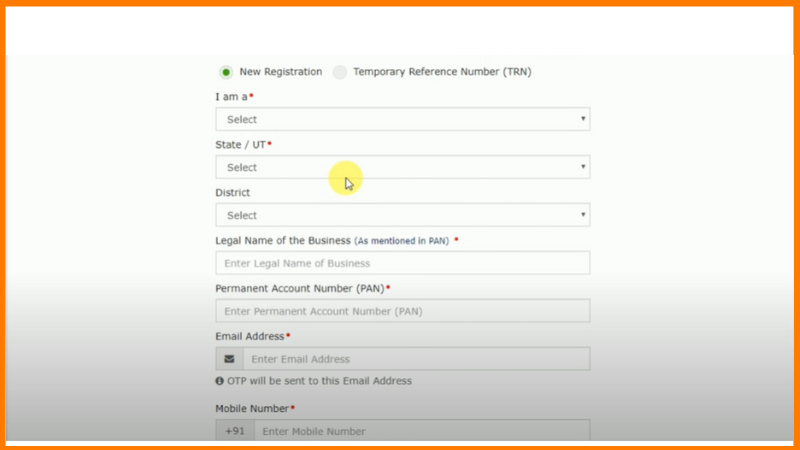
After entering the details click proceed. After that you'll receive two different OTP on your phone and Email id for verifying the mobile number and the email id. OTP is valid only for 10 minutes. Enter the Received OTP and click proceed.
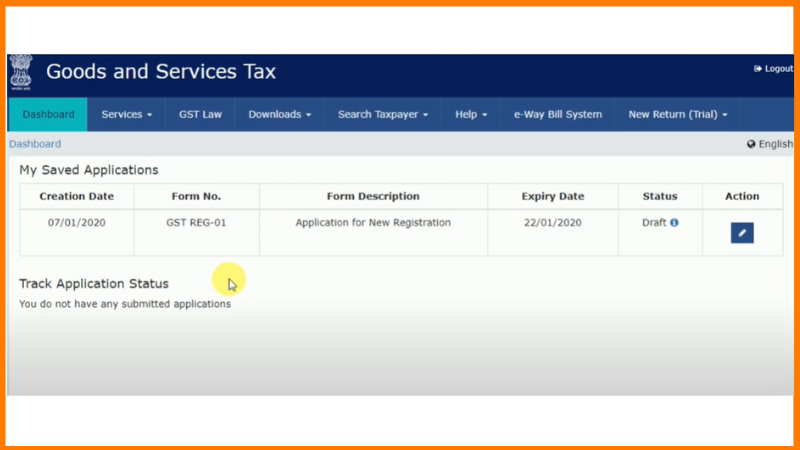
Once you click proceed your Temporary Reference number will be generated. Save and copy your TRN number it will be used for further filling of the form.
This was the complete Part A of Registering for GST online.
If you want some Help with tax preparation and planning
Part B
Now to use this TRN number, either click Proceed or Services > Registration > New Registration option and select the Temporary Reference Number (TRN).
Enter your TRN number and the captcha text as shown on your screen. Click proceed and you will be asked to verify OTP again. (This is different from the previous OTP generated), Same OTP will be received on your phone and email id.
Filling in your GST Application form
Now click on action button on top right to start filling your GST application form.
The form contains 9 sections.
1. Business Details
Enter the details of your business. Enter the name of your shop under the Trade name and enter the constitution of business, private limited or partnership etc.
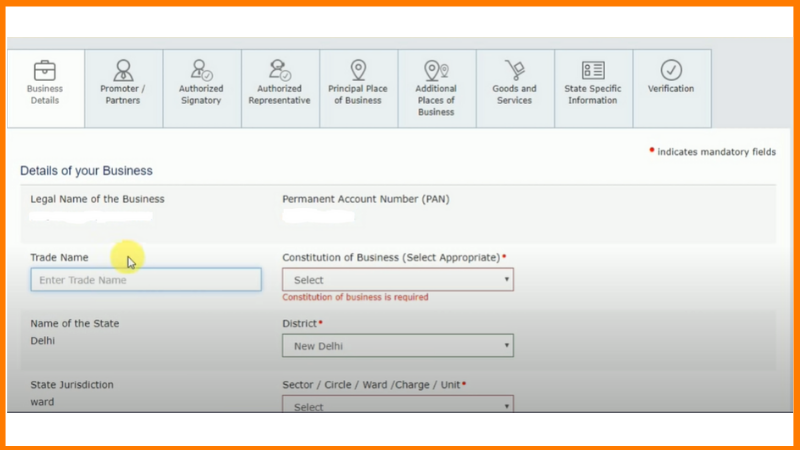
After you complete your registration click on save and continue to proceed further.
2. Personal Information
Enter the Required personal information and identity information. In identity information under designation, Add the designation of yourself. Suppose if you are proprietor add proprietor under that.
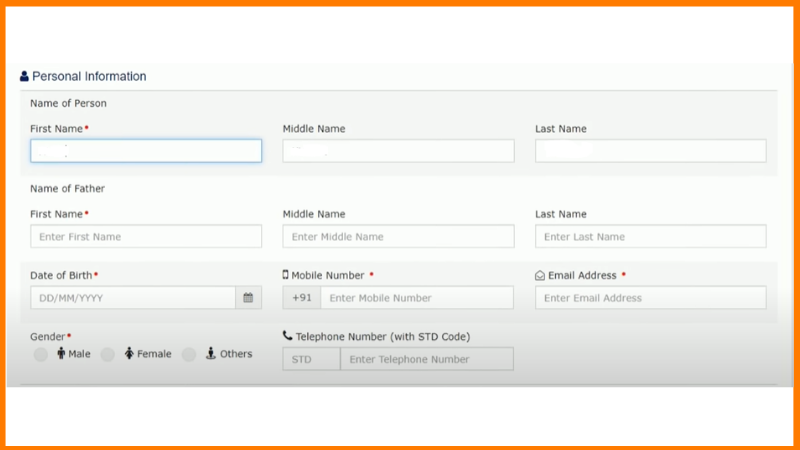
After you add all the details you have to upload your photograph, which should be in jpeg format of size maximum up to 100kb.
3. Authorized Signatory
If you are the proprietor of the company just click on primary authorized signatory and proceed further. If you are not the proprietor of the company then fill in the details of the proprietor of your company.
4. Authorized Representative
If you have an Authorized representative you have to fill in the details of your representative or else Click on save and continue to proceed further.
 StartupTalky
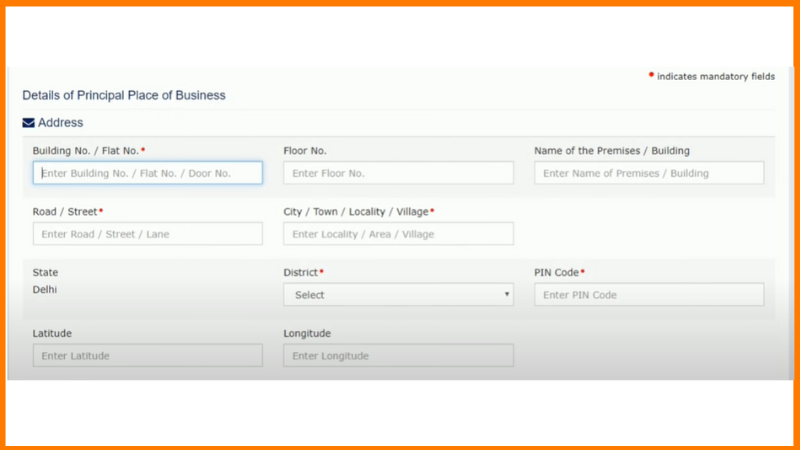
5. Principal place of Business
Here, You have to add the details where your business is located, if your business is in Delhi then add the location details of your business.
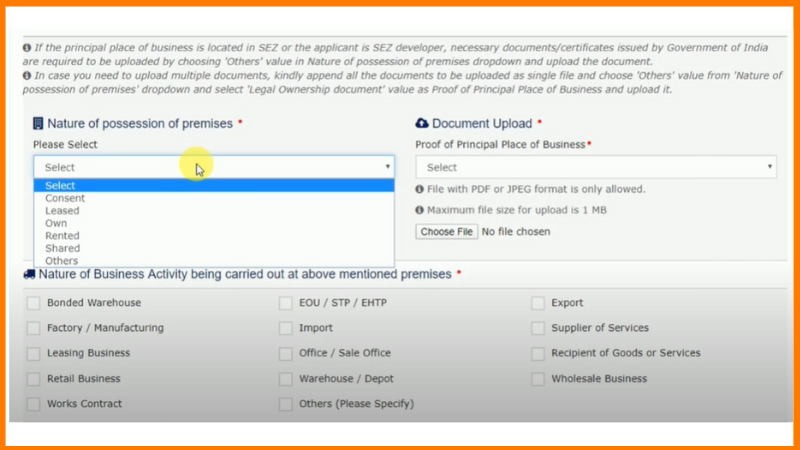
You also have to add nature of your business. Under the nature of possession of premises add the type of your business and provide the document proof of place of business. Suppose you have a Rented business so click on rented and provide the proof of rented agreement such as electricity bill.
Also add the nature of business activity and click on save and continue to proceed further.
6. Additional places of Business
If you have Additional places of business you can Add it or click on continue to proceed further.
StartupTalky
7. Goods and Services
Here you have to add if you are selling goods or services. If you are selling physical goods add the HSN code. (HSN is a six-digit code that classifies more than 5000 products, arranged in a legal and logical structure)
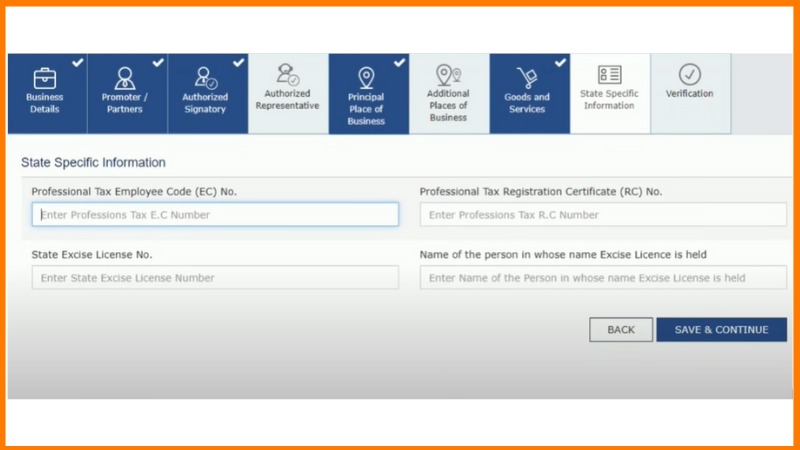
8. State Specific Information
Providing this information is up to you because it is not mandatory. Click on save and continue to proceed further.
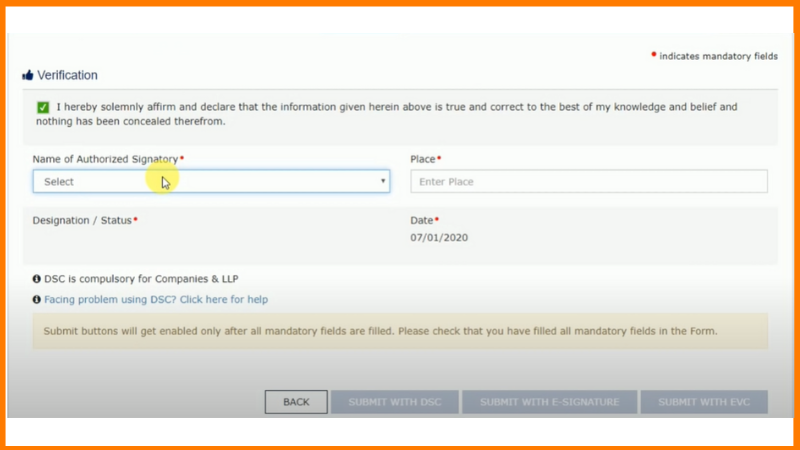
9. Verification
This is the final step of GST form. Once you fill the details you can choose to submit with EVC or DVC. If you select EVC you'll receive same OTP on your mobile no. and email id. If you have a digital signature you can submit with DVC.
On completion, an Application Reference Number (ARN) will be generated and sent to your mobile number and email id. You can use this to track your application status (Services > Registration > Track Application).
This was the complete process to register your Gst online step by step.
Link : https://startuptalky.com/how-register-gst-online/
Author :- Arbaaz sayed
August 02, 2020 at 10:12AM
startuptalky